Getting Started with Plotivy: From Raw Data to Publication Figure in 5 Minutes

Remember the last time you needed a quick figure for a paper? Installing Python, managing environments, debugging matplotlib errors, searching Stack Overflow for that one syntax you forgot... again.
Plotivy removes all of that friction. Go from raw data to a publication-ready figure in under 5 minutes - no coding required.
The 5-Minute Walkthrough
0.Live Code: Your First Figure
1.Upload Your Data
2.Describe Your Goal
3.Inspect the Code
4.Export for Publication
0. Live Code: Your First Figure
This is what Plotivy generates when you type "Plot Temperature vs Reaction Rate with a trend line". A scatter plot with error bars and polynomial fit - ready for your paper.
1. Upload Your Data (30 seconds)
Navigate to the Analyze page and upload your dataset. Plotivy supports CSV, Excel (.xlsx), and JSON.
The system automatically detects column names and data types. You do not need to manually format your spreadsheet - the AI handles typical inconsistencies like missing headers or mixed data types.
No Data?
Try one of our built-in example datasets to explore the tool before uploading your own data. Click any "Try this example" link throughout this guide.
2. Describe Your Goal (1 minute)
Try it
Try it now: review your figure before submission
Upload your current plot and get an AI critique with concrete fixes for clarity, typography, color, and journal readiness.
Open AI Figure Reviewer →Newsletter
Get a weekly Python plotting tip
One concise tip each week for cleaner, faster scientific figures. Built for researchers who publish.
Instead of Googling "matplotlib scatter plot error bars" for the 100th time, just describe what you want in plain English. Be specific about variables and style.
“Plot mean +/- 95% CI of Yield by Group; use a colorblind-safe palette”
Try this example →“Create a scatter plot of Temperature vs Rate with error bars and a trend line”
Try this example →“Make a 2x2 grid of subplots comparing all four measurement columns”
Try this example →3. Inspect the Code (1 minute)
Unlike other AI tools that hide what happens, Plotivy shows you every line of Python code. This is crucial for two reasons:
Verification
Check exactly how the data was processed and plotted. No black boxes.
Learning
By reading the generated code, you learn Matplotlib and Seaborn naturally - without the tutorials.
4. Export for Publication (30 seconds)
When your figure looks right, export in journal-ready format. No more "please resubmit with higher resolution" rejections.
SVG / PDF
Vector graphics that scale infinitely. Required by Nature, Science, Cell.
PNG (300+ DPI)
High-resolution raster for presentations, posters, and web use.
Next Steps After Your First Figure
- - Multi-Panel Figures: Ask for "a 2x2 grid of plots" to compare variables
- - Statistical Analysis: Request "ANOVA results with p-value annotations"
- - Custom Styling: Prompt for specific journal styles: "Style for Nature publication"
Chart gallery
Popular chart types to try
Explore these chart types as your next Plotivy project.
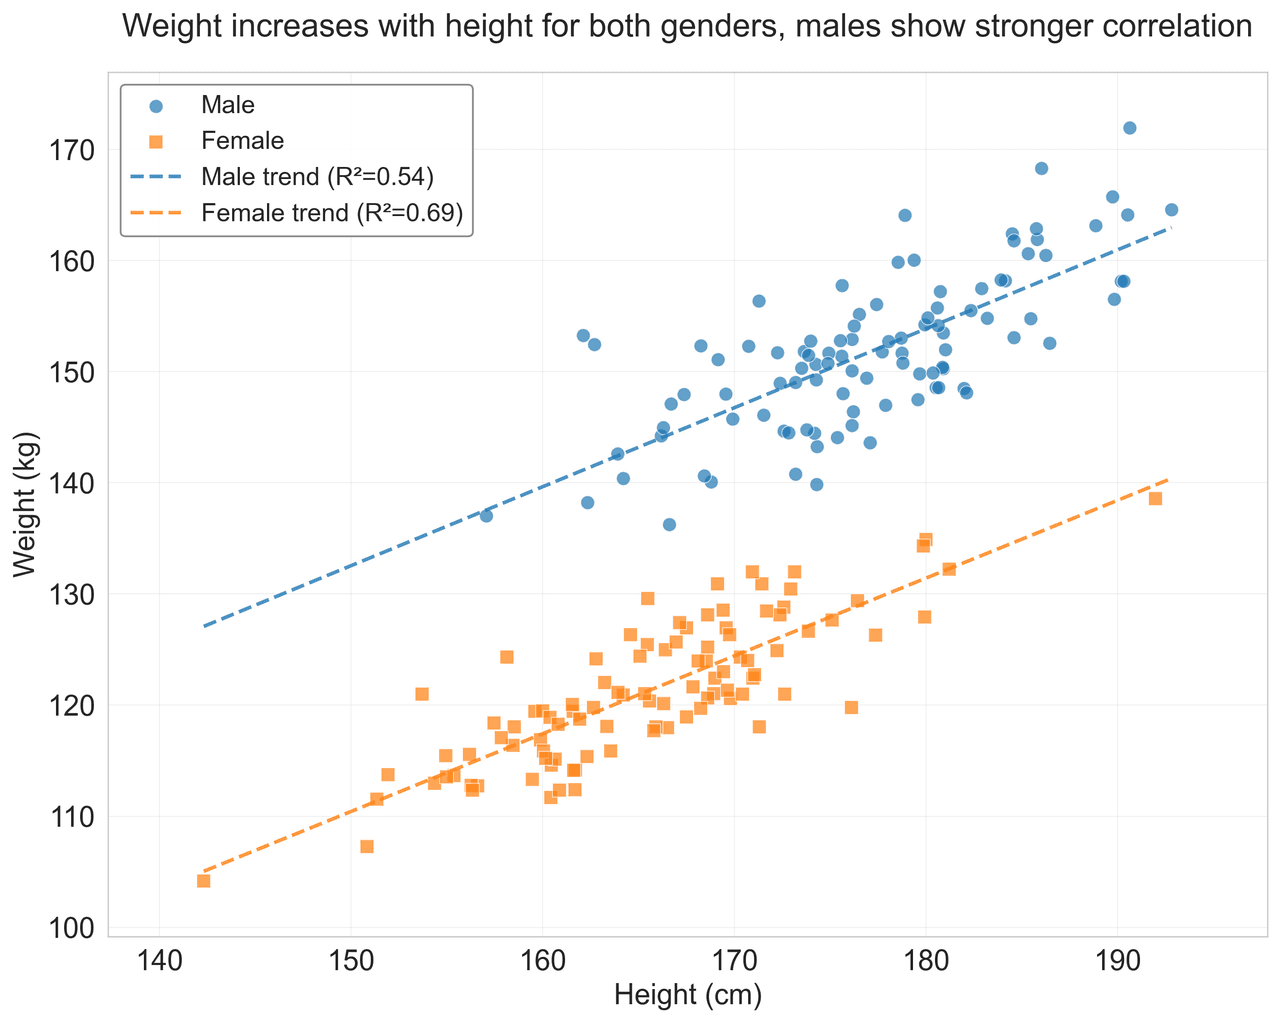
Scatterplot
Displays values for two variables as points on a Cartesian coordinate system.
Sample code / prompt
import matplotlib.pyplot as plt
import numpy as np
from scipy import stats
import pandas as pd

# Generate sample data
np.random.seed(42)
n_samples = 200
height = np.random.normal(170, 8, n_samples)
weight = height * 0.6 + np.random.normal(0, 8, n_samples) - 50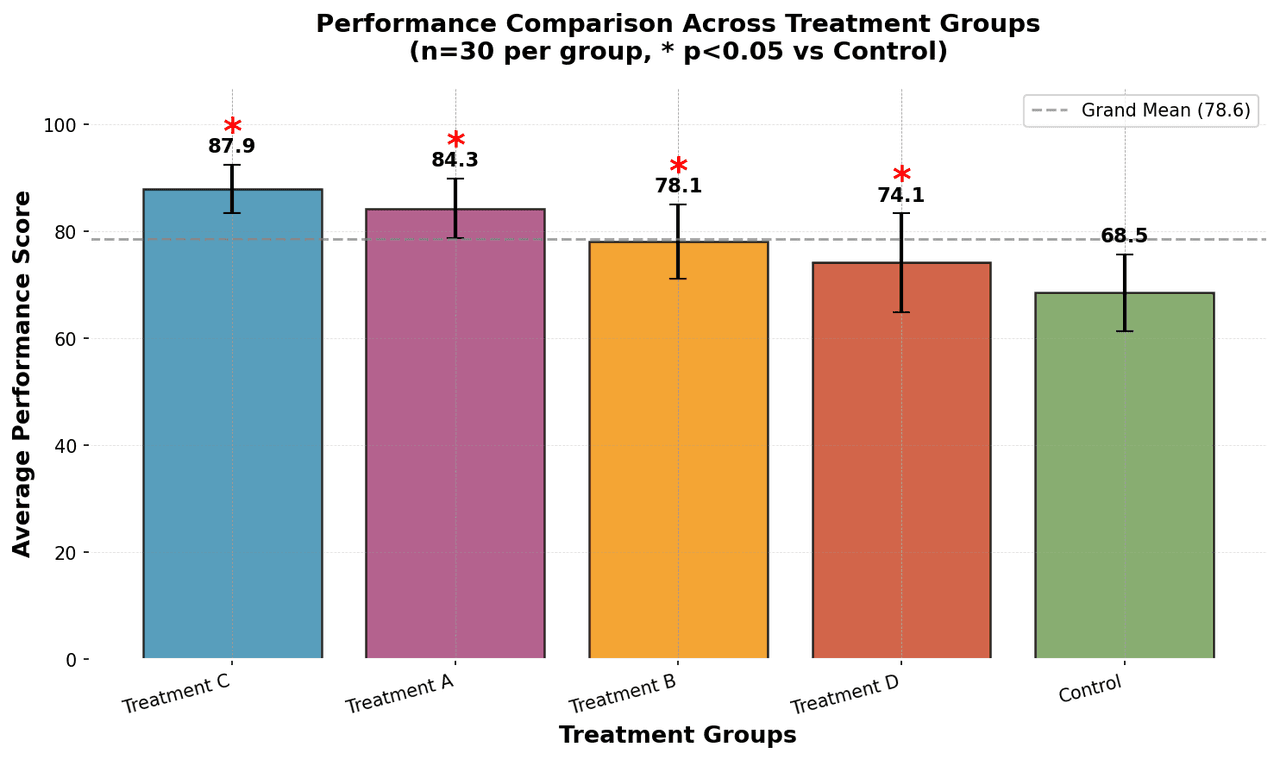
Bar Chart
Compares categorical data using rectangular bars with heights proportional to values.
Sample code / prompt
import numpy as np
import pandas as pd
import matplotlib.pyplot as plt
import seaborn as sns
from scipy import stats

# Generate performance scores for 5 treatment groups
np.random.seed(42)
groups = ['Control', 'Treatment A', 'Treatment B', 'Treatment C', 'Treatment D']
n_samples = 30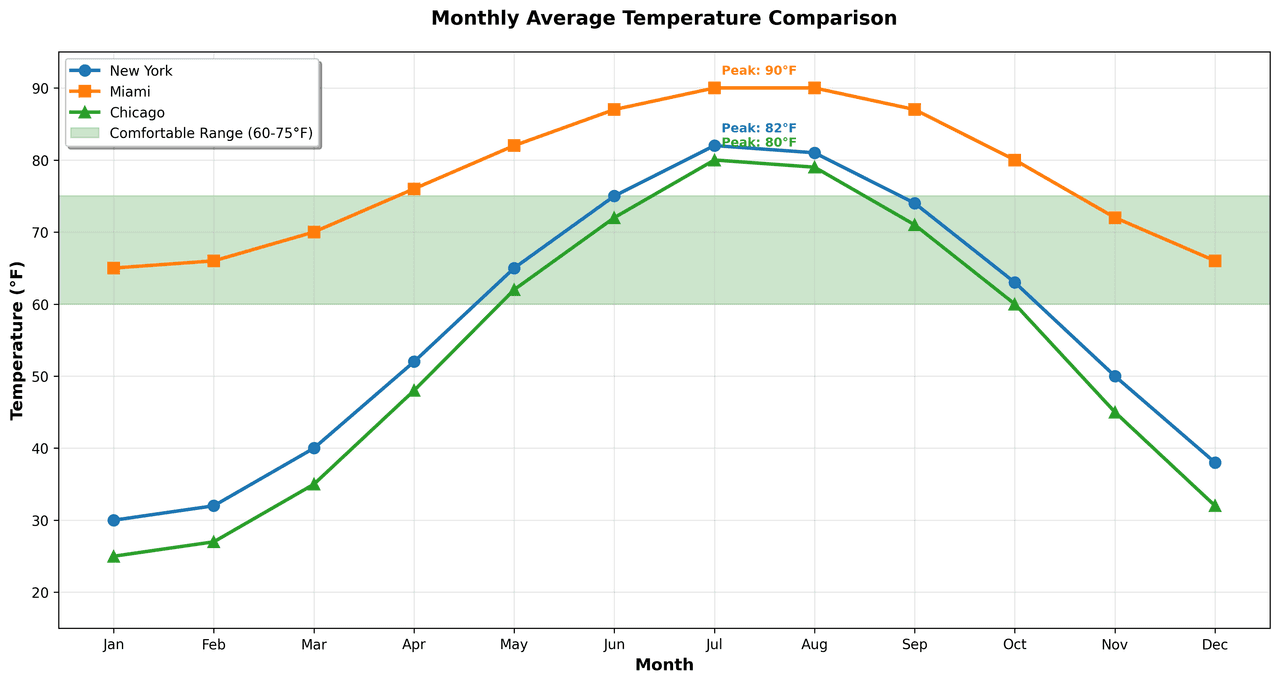
Line Graph
Displays data points connected by straight line segments to show trends over time.
Sample code / prompt
import matplotlib.pyplot as plt
import numpy as np

# Generate temperature data for 3 major US cities over 12 months
months = ['Jan', 'Feb', 'Mar', 'Apr', 'May', 'Jun', 'Jul', 'Aug', 'Sep', 'Oct', 'Nov', 'Dec']
nyc = [30, 32, 40, 52, 65, 75, 82, 81, 74, 63, 50, 38]
miami = [65, 66, 70, 76, 82, 87, 90, 90, 87, 80, 72, 66]
chicago = [25, 27, 35, 48, 62, 72, 80, 79, 71, 60, 45, 32]

# Create figure with enhanced styling.png&w=1280&q=70)
Box and Whisker Plot
Displays data distribution using quartiles, median, and outliers in a standardized format.
Sample code / prompt
import numpy as np
import pandas as pd
import matplotlib.pyplot as plt
import seaborn as sns
from scipy import stats

# Generate gene expression data for 4 genotypes
np.random.seed(42)
genotypes = ['WT', 'KO1', 'KO2', 'Mutant']
n_per_group = 20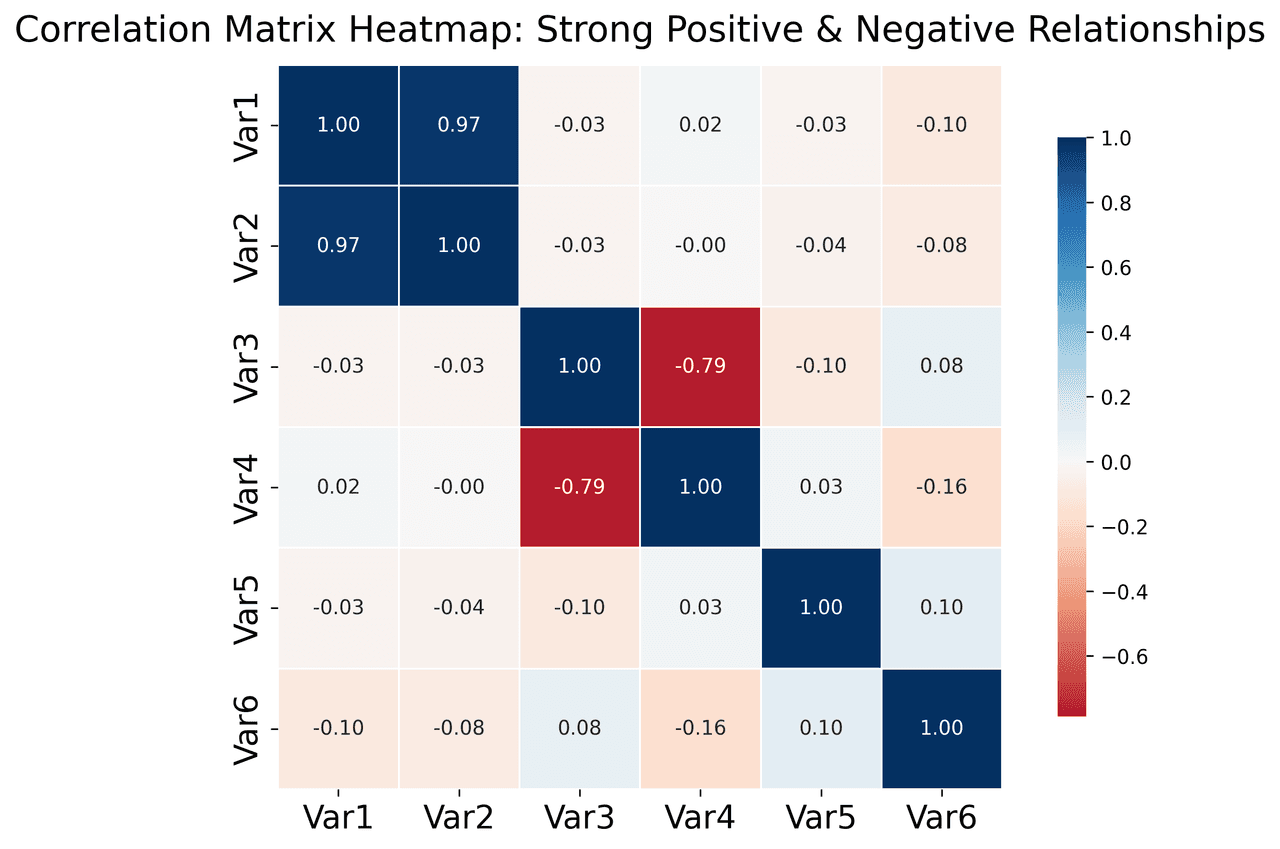
Heatmap
Represents data values as colors in a two-dimensional matrix format.
Sample code / prompt
import matplotlib.pyplot as plt
import seaborn as sns
import pandas as pd
import numpy as np

# Create correlation matrix for financial metrics
metrics = ['Revenue', 'Profit', 'Expenses', 'ROI', 'Customers', 'AOV', 'Marketing', 'Employees']
correlation_data = np.array([
    [1.00, 0.85, -0.45, 0.72, 0.88, 0.65, 0.72, 0.55],
[0.85, 1.00, -0.78, 0.92, 0.75, 0.58, 0.63, 0.48],Ready to Try It?
The best way to learn is by doing. Upload your own data and see results in seconds.
Technique guides scientists read next
scipy.signal.find_peaks guide
Tune prominence and width parameters for robust peak extraction.
Savitzky-Golay smoothing
Reduce noise while preserving peak shape and position.
PCA visualization workflow
Move from high-dimensional measurements to interpretable components.
ANOVA with post-hoc brackets
Add statistically correct pairwise significance annotations.
Found this helpful? Share it with your network.
Experimental Physicist & Photonics Researcher
Hands-on experience in silicon photonics, semiconductor fabrication (DRIE/ICP-RIE), optical simulation, and data-driven analysis. Built Plotivy to help researchers focus on discoveries instead of data struggles.
More about the authorVisualize your own data
Apply the techniques from this article to your own datasets. Upload CSV, Excel, or paste data directly.